Get ready to give your fireplace a stunning makeover without breaking the bank! In this article, we will explore a range of budget-friendly DIY decor ideas that will take your fireplace to a whole new level. From simple and elegant designs to creative and unique concepts, we have got you covered. With these affordable and easy-to-implement ideas, you can transform your space into a cozy and inviting haven, perfect for those chilly nights by the fire. So, grab your tools and let’s get started on giving your fireplace the upgrade it deserves!
This image is property of images.pexels.com.
Budget-friendly Fireplace Transformation
1. Repainting the Fireplace
Choose a color scheme
When repainting your fireplace, it’s important to choose a color scheme that complements the overall aesthetics of your space. Consider the existing colors in the room and decide whether you want the fireplace to blend in or stand out as a focal point. Neutral tones like white, cream, or gray are popular choices for a timeless and versatile look. However, if you want to add a pop of color or create a bold statement, you can opt for a bolder shade that matches your personal style.
Prep the surface
Before applying paint to your fireplace, it’s crucial to properly prep the surface. Start by cleaning the fireplace with a mixture of water and mild soap to remove any dirt, dust, or soot. Next, use sandpaper to smooth out any rough patches or imperfections on the surface. If there are areas with existing paint that are peeling or chipping, consider using a scraper to remove them. Lastly, wipe down the entire surface with a tack cloth to ensure it is clean and ready for painting.
Apply the paint
When it comes to repainting your fireplace, it’s essential to choose a high-heat resistant paint specifically designed for this purpose. Select a brush or roller that is suitable for your chosen paint type and start applying the paint in even strokes, following the natural grain of the fireplace. Apply multiple coats if necessary, allowing sufficient drying time between each coat. Once the paint has dried completely, you can step back and admire your beautifully repainted fireplace.
2. Adding a Statement Mantel
Select the material
Adding a statement mantel to your fireplace can instantly elevate its appearance. When selecting a material for your mantel, consider both its visual appeal and practicality. Wood is a popular choice, as it offers a timeless and natural charm. Options like oak, pine, or reclaimed wood can add warmth and character to your space. Alternatively, you can explore materials like stone, marble, or even concrete for a more contemporary and luxurious look. Choose a material that suits your personal style and complements the overall aesthetic of your home.
Measure and cut the mantel
Once you have selected the perfect material, it’s time to measure and cut the mantel to the desired length. Start by taking accurate measurements of your fireplace, ensuring that the mantel will fit proportionately. Use a saw or other suitable cutting tool to trim the mantel according to your measurements. Take your time and make precise cuts to achieve a seamless and professional finish.
Attach the mantel to the wall
Attaching the mantel to the wall requires careful consideration of both safety and aesthetics. First, locate the studs behind the wall where you plan to install the mantel. This will provide a secure anchor point for the mantel and prevent it from falling. Use a stud finder to identify the studs and mark their positions on the wall. Next, use appropriate brackets, screws, or other hardware to attach the mantel to the studs. Ensure that the mantel is level and secure before adding any decorative elements or displaying items on top of it.
Affordable DIY Fireplace Decor Ideas
3. Creating a Faux Stone Facade
Gather the materials
Creating a faux stone facade for your fireplace can give it a stunning and realistic appearance without the high cost of natural stone. To get started, gather the necessary materials, including faux stone veneer panels, adhesive or mortar, a trowel, a level, and a utility knife. You can find faux stone veneer panels in various styles and colors, allowing you to choose the perfect option to complement your existing decor.
Prepare the fireplace surface
Before applying the faux stone veneer, it is important to properly prepare the surface of your fireplace. Clean the fireplace thoroughly, removing any dirt, dust, or debris. Smooth out any imperfections using sandpaper and ensure that the surface is dry before proceeding. Apply a layer of primer to the fireplace to promote better adhesion of the faux stone veneer.
Apply the faux stone veneer
When applying the faux stone veneer, start from the bottom and work your way up. Apply a layer of adhesive or mortar to the back of each veneer panel using a trowel. Press the panel firmly onto the fireplace surface, using a level to ensure it is straight. Repeat this process for each panel, ensuring a tight fit and seamless appearance. Use a utility knife to trim the veneer panels as necessary to fit around corners or obstacles. Allow the adhesive or mortar to dry completely before enjoying your newly transformed fireplace with its beautiful faux stone facade.
4. Installing a Fireplace Insert
Choose the right insert
Installing a fireplace insert can enhance both the aesthetic appeal and functionality of your fireplace. There are various types of fireplace inserts to choose from, including gas, electric, and wood-burning options. Consider your heating needs, budget, and any safety regulations in your area when deciding on the right insert for your fireplace. Gas inserts, for example, provide convenience and efficiency, while wood-burning inserts offer a cozy and traditional ambiance.
Prepare the fireplace
Before installing a fireplace insert, it is crucial to prepare the existing fireplace properly. Start by cleaning the fireplace thoroughly, removing any debris or soot. Check the chimney for any blockages or damage that may affect the performance of the insert. Ensure that the chimney is in good condition and meets the necessary safety standards. If needed, hire a professional chimney sweep to clean and inspect the chimney.
Install the fireplace insert
Installing a fireplace insert typically requires professional help due to the complexity of the task. It involves connecting the insert to a venting system, ensuring proper airflow, and integrating any necessary gas or electrical connections. Consult a licensed professional to handle the installation process, as they have the expertise and knowledge to ensure a safe and efficient installation. Enjoy the benefits of your new fireplace insert, which can provide increased heating efficiency and a more modern appearance.
This image is property of images.pexels.com.
5. Refreshing the Surrounding Walls
Select a new paint color
Refreshing the surrounding walls of your fireplace can have a significant impact on the overall look and feel of the space. When selecting a new paint color, consider the existing colors in the room and choose a shade that complements them. You can opt for a color that harmonizes with the fireplace or one that creates a striking contrast. Earthy tones like beige, taupe, or light gray can create a warm and inviting atmosphere, while bolder hues like navy blue or deep green can add a touch of drama and sophistication.
Repair any damaged areas
Before painting the walls, take the time to repair any damaged or uneven areas. Fill in any cracks, holes, or dents with spackling compound or putty, and sand them smooth once dry. If there are areas with peeling or chipping paint, scrape off the loose paint and sand the edges for a seamless transition between old and new layers of paint. A smooth and well-prepared surface will help ensure a professional-looking result.
Apply multiple coats of paint
To achieve a polished and even finish, it is important to apply multiple coats of paint. Start by applying a coat of primer to create a smooth base and enhance the adhesion of the paint. Allow the primer to dry completely before applying the chosen color. Use a high-quality paint roller or brush to apply the paint, working in even strokes and maintaining a consistent pressure. Depending on the color and the existing wall color, you may need to apply two or more coats for optimal coverage. Allow sufficient drying time between each coat, and step back to appreciate the refreshed walls that beautifully complement your fireplace.
6. Enhancing the Hearth
Choose a new material
Enhancing the hearth of your fireplace can transform it into a visually appealing and functional element. Select a new material for the hearth that aligns with your design preferences and complements the overall style of your space. Traditional choices like brick or natural stone provide a classic and timeless look, while options like porcelain tile or concrete offer a more contemporary and sleek appearance. Consider factors such as durability, maintenance requirements, and compatibility with your fireplace insert when deciding on the perfect material.
Measure and prepare the hearth
Careful measurements are essential to ensure a proper fit when enhancing the hearth. Measure the dimensions of your current hearth, including its length, width, and depth, as well as any cutouts or special shapes required. After taking accurate measurements, prepare the hearth by cleaning it thoroughly, removing any existing material, and ensuring it is level and free from debris.
Install the new hearth
The installation process will depend on the chosen material for your new hearth. For brick or natural stone, you can lay the pieces individually, applying mortar and ensuring they are level and secure. Porcelain tile or concrete hearths may involve using adhesive or mortar to adhere the tiles or slabs to the existing surface. Follow the manufacturer’s instructions and use appropriate tools and techniques to achieve a professional finish. Once the new hearth is installed, step back and admire its enhanced beauty and functionality, completing the overall fireplace transformation.

This image is property of images.pexels.com.
7. Incorporating a Built-in Bookshelf
Determine the size and layout
Incorporating a built-in bookshelf around your fireplace can add both practicality and visual interest to the space. Start by determining the size and layout of the bookshelf, considering the available space and the desired proportions. Take accurate measurements of the area where you plan to install the bookshelf, including the height, width, and depth. Consider factors such as the number of shelves, their spacing, and any additional features like cabinets or drawers, based on your storage needs and design preferences.
Build the bookshelf frame
Building the bookshelf frame requires careful planning and precise measurements. Start by constructing the main frame using quality wood or other suitable materials. Use a level to ensure the frame is plumb and square, and secure it to the wall and floor for stability. Depending on the design, you may need to add additional supports or dividers for added strength. Make adjustments as necessary to achieve the desired dimensions and stability.
Add shelves and finishing touches
With the frame in place, it’s time to add shelves and any additional finishing touches. Cut shelves to the desired size and install them securely within the frame, using appropriate hardware or brackets. Ensure they are level and evenly spaced to create a cohesive and visually appealing bookshelf. Consider adding baseboards, crown molding, or trim to enhance the overall aesthetics. Once everything is in place, sand, prime, and paint the bookshelf to match your desired color scheme. Finally, arrange books and other decorative items on the shelves to personalize the space and create an inviting display.
8. Hanging a Decorative Mirror
Select an appropriate mirror
Hanging a decorative mirror above your fireplace can add depth, elegance, and a touch of glamour to the space. When selecting a mirror, consider its size, shape, and style to ensure it complements the overall aesthetic of your fireplace and the surrounding decor. Choose a mirror that is proportionate to the wall and fireplace, avoiding one that is too small or too large. Additionally, consider the frame material and design, whether it’s a sleek and modern frame or an ornate and traditional one.
Determine the placement
Determining the placement of the mirror is crucial to achieve a balanced and visually pleasing composition. Measure the width of the fireplace and mark its center point. This will serve as a reference point for hanging the mirror. Based on the mirror’s size and your preference, decide whether you want it centered directly above the fireplace or slightly off-center for a more artistic or asymmetrical look. Use a measuring tape and a pencil to mark the desired hanging position on the wall.
Securely hang the mirror
To securely hang the mirror, it’s important to use appropriate hardware and installation methods. Check the weight of the mirror and choose suitable wall anchors, screws, or hooks to ensure it can support the mirror’s weight. Place the hardware on the wall according to the marked hanging position, ensuring it is level and properly aligned. With the help of a friend or family member, carefully lift the mirror and hang it on the wall, gently adjusting its position until it is centered and level. Step back and enjoy the stunning reflection and added dimension that the decorative mirror brings to your fireplace.
9. Installing a Tile Backsplash
Choose the tile design
Installing a tile backsplash can enhance the visual appeal and protect the area surrounding your fireplace. When selecting a tile design, consider your personal style and the existing decor in the room. Whether you prefer a sleek and modern look with subway tiles or a more intricate design with mosaic tiles, choose a design that complements the overall aesthetics of your space. Additionally, select tiles that are suitable for high-heat areas and easy to clean.
Prepare the wall surface
Prior to installing the tile backsplash, it’s important to prepare the wall surface properly. Clean the area thoroughly, removing any dirt, dust, or debris. Smooth out any imperfections using sandpaper and ensure a level and even surface. Prime the wall to promote better adhesion of the tile mortar and create a suitable surface for the tiles.
Install the tile backsplash
To install the tile backsplash, start by measuring and marking the desired height and width of the area. Mix the tile mortar according to the manufacturer’s instructions and spread a layer of mortar onto the prepared wall using a trowel. Place the tiles onto the mortar, pressing firmly and evenly. Use tile spacers to ensure even spacing between tiles and maintain a seamless look. Once all the tiles are in place, allow the mortar to dry completely before grouting the tiles. Use a grout float to apply grout, wiping away any excess with a damp sponge. Finally, admire your beautifully installed tile backsplash, which adds texture, color, and protection to your fireplace.
10. Adding Decorative Accessories
Select complementary decor items
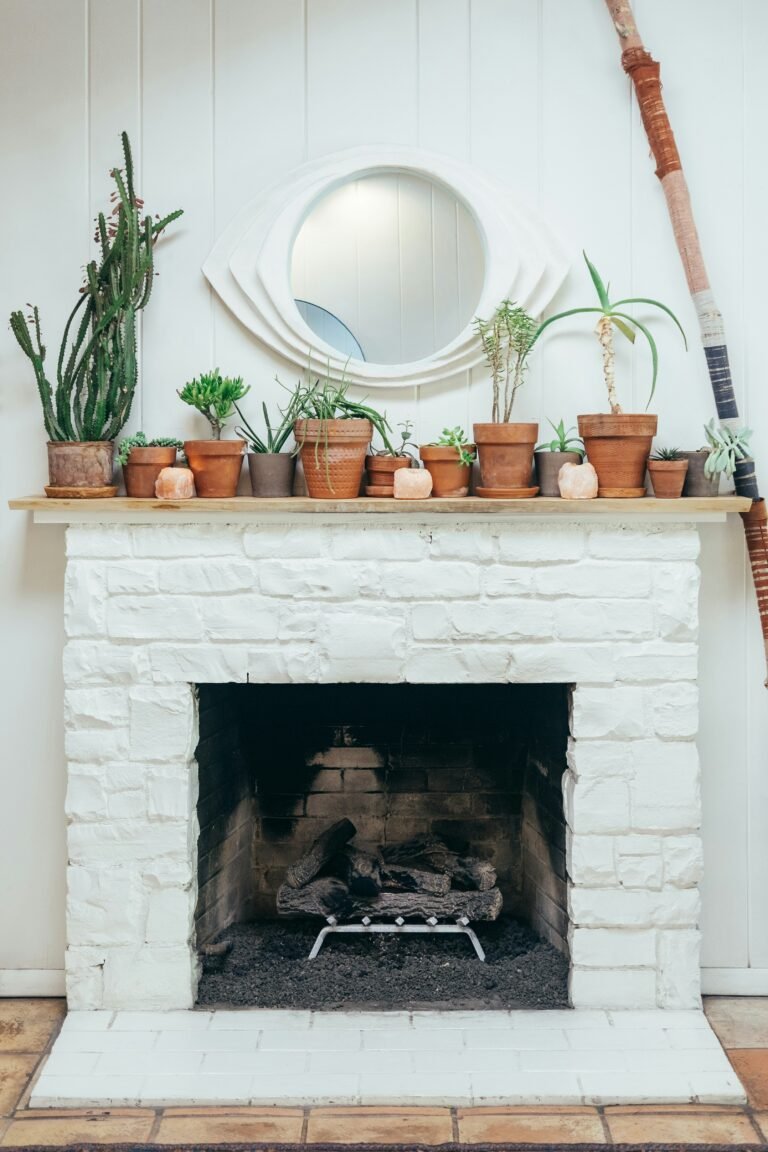
Adding decorative accessories is the final step in transforming your fireplace into a visually stunning focal point. Choose complementary decor items that harmonize with your overall design theme and color scheme. Consider elements like candle holders, vases, artwork, or plants to add interest and personality to the space. Ensure that the accessories you select are appropriately sized to avoid overwhelming or overcrowding the fireplace area.
Arrange and display the accessories
Arranging and displaying the accessories around your fireplace requires a thoughtful approach. Start by considering the balance and symmetry of the arrangement. Place larger items first, such as artwork or a statement vase, to serve as the focal point. Then, strategically position smaller items around them, maintaining a sense of balance and visual interest. Experiment with different heights, textures, and colors to create a dynamic and visually appealing display.
Ensure cohesion and balance in the design
To achieve cohesion and balance in the design, it’s important to step back and assess the overall arrangement of the decorative accessories. Look for any imbalances or areas that appear cluttered, and make adjustments as necessary. Take into consideration the proportions and scale of the room, as well as the fireplace’s size and style. Regularly reassess the arrangement and make changes to ensure that it reflects your personal style and creates a harmonious visual impact.
By following these budget-friendly DIY decor ideas for your fireplace, you can transform your space into a stunning focal point that reflects your personal style and brings warmth and character to your home. From repainting the fireplace to adding decorative accessories, each step contributes to the overall transformation. Get creative, have fun, and enjoy the process of elevating your fireplace on a budget.
