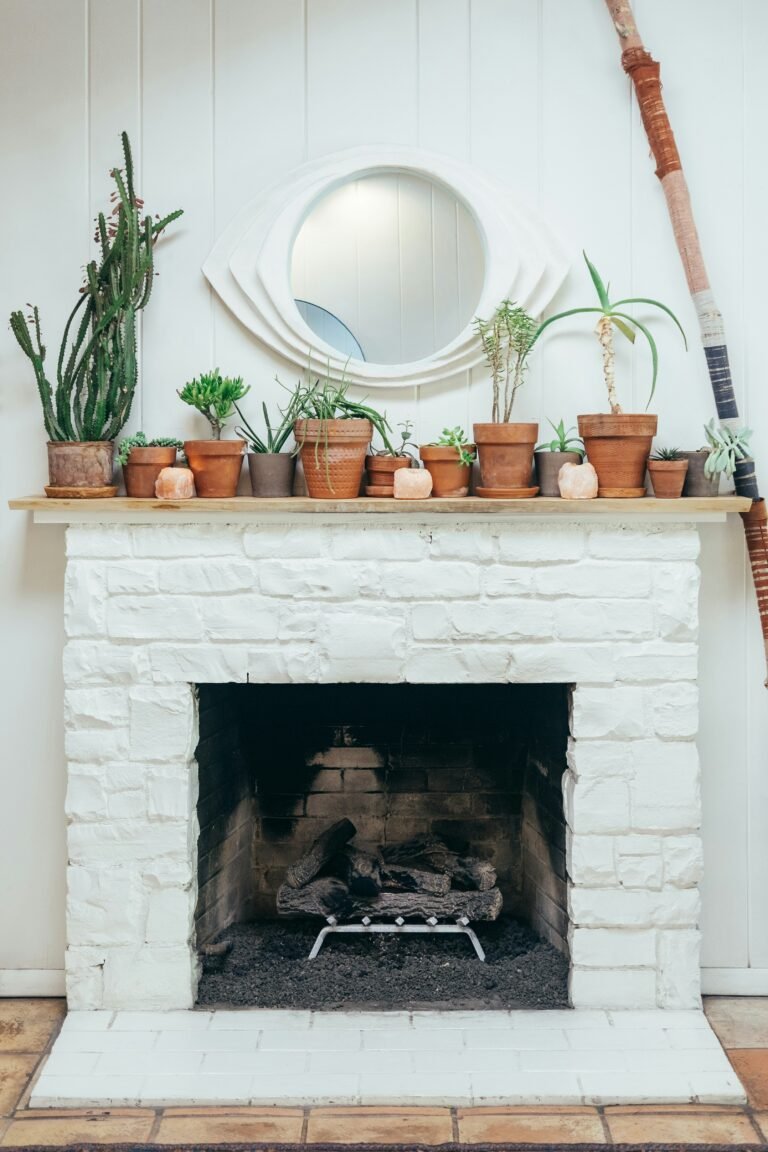
Transform your living space into a cozy haven without breaking the bank with these DIY faux fireplace ideas. Whether you’re yearning for a vintage charm or a modern aesthetic, these budget-friendly projects offer the perfect solution to bring warmth and character to any room. From using old furniture and reclaimed wood to creating realistic flame effects, immerse yourself in this handy guide and discover how to create a stunning faux fireplace that will be the envy of all your friends.
This image is property of images.unsplash.com.
Cardboard Fireplace
Have you ever wanted to cozy up by a warm fireplace during the chilly winter months, but didn’t have the budget or space for a real one? Well, we have the perfect solution for you! With just a few materials and a little bit of creativity, you can create your very own faux fireplace that will add charm and warmth to any room. Let’s get started!
Materials needed
- Cardboard boxes (various sizes)
- Box cutter or scissors
- Tape
- Paint and paintbrushes
- Twinkle lights (optional)
Instructions
- Begin by gathering your cardboard boxes. You can use any boxes you have on hand, such as shipping boxes or shoe boxes. The sizes and shapes of the boxes will depend on the design you want for your fireplace.
- Lay out the boxes and use a box cutter or scissors to cut out the shape of a fireplace. You can get creative with the design – whether it’s a traditional rectangle or a more elaborate mantel and surround.
- Once you have cut out the basic shape, assemble the boxes by taping them together securely. Make sure to leave a space for the “fireplace opening” where you’ll later add decorative elements.
- With your cardboard fireplace assembled, it’s time to add some color! Use paint and paintbrushes to give your fireplace a realistic look. You can go for a classic brick or stone look, or get creative with vibrant colors – it’s completely up to you!
- After the paint has dried, twinkling lights can be added inside the fireplace to create the illusion of a glowing fire. Simply poke small holes in the cardboard and thread the lights through, securing them with tape.
- Now that your faux fireplace is complete, find the perfect spot in your home to display it. You can place it against a wall, fill the “fireplace opening” with logs or candles for added ambiance, and even hang a wreath or stockings above it for a festive touch.
Optional embellishments
If you want to take your cardboard fireplace to the next level, there are plenty of optional embellishments you can add. Here are a few ideas:
- Attach a wooden mantel to the top of the cardboard fireplace for a more realistic look.
- Use adhesive wallpaper or contact paper to mimic the appearance of brick or stone.
- Add a hearth by placing a large piece of foam or fabric-covered plywood in front of the fireplace.
- Hang a mirror above the fireplace to create the illusion of depth and reflection.
With a bit of DIY flair and a dash of creativity, your cardboard fireplace will transform any space into a cozy and inviting retreat. So grab your materials and start creating your very own budget-friendly faux fireplace today!
Wooden Crate Fireplace
If you’re looking for a rustic and charming focal point for your room, a wooden crate fireplace might be just the thing you need. Made from old wooden crates or pallets, this DIY faux fireplace adds warmth and character to any space. Follow these steps to create your very own wooden crate fireplace.
Materials needed
- Wooden crates or pallets
- Screws
- Screwdriver or drill
- Wood glue
- Nails and hammer (optional)
- Paint or stain
- Paintbrushes
Instructions
- Start by gathering your wooden crates or pallets. You can often find these for free or at a low cost on websites like Craigslist or at local thrift stores. The number of crates or pallets you’ll need will depend on the size and design of your fireplace.
- Begin by assembling the base of your fireplace. Stack the crates or pallets to the desired height, making sure they are secure and stable. Use screws, a screwdriver, and possibly wood glue for added strength.
- Once the base is assembled, it’s time to build the mantel and surround. Use additional crates or pallets to create the shape of a mantel, and attach them securely to the base with screws and/or nails.
- With your wooden crate fireplace fully assembled, it’s time to add some color. Using paint or stain, give your fireplace a finish that matches your room’s décor. You can opt for a natural wood finish, or go with a bold color for a pop of personality.
- Let the paint or stain dry completely before moving your fireplace into its final position. This will prevent any smudging or damage to your newly finished creation.
- Once in place, you can decorate your wooden crate fireplace in a variety of ways. Add candles, decorative vases, or framed artwork to the mantel for a personal touch. You can also hang a wreath or stockings above the fireplace to enhance the cozy ambiance.
Decorating the crate
To take your wooden crate fireplace to the next level, consider these additional decorating ideas:
- Attach hooks or knobs to the sides of the crates for hanging accessories like small tools, keys, or scarves.
- Line the inside of the crates with faux brick, stone wallpaper, or fabric to create a more realistic look.
- Place a basket of firewood or a stack of books next to the fireplace to bring warmth and authenticity to the space.
With a few simple materials and a little bit of effort, you can create a stunning wooden crate fireplace that will have your guests wondering if it’s the real deal. So gather your supplies, roll up your sleeves, and get ready to enjoy the cozy and charming ambiance of your very own faux fireplace.
Affordable DIY Fireplace Options
Bookcase Fireplace
If you’re a book lover who dreams of curling up by a cozy fireplace, this DIY faux fireplace made from a bookcase is the perfect project for you. Not only will it add charm and warmth to your space, but it also provides an opportunity to showcase your favorite books. Follow these steps to create your own bookcase fireplace.
Materials needed
- Bookcase
- Cardboard or foam board
- Box cutter or scissors
- Paint or contact paper
- Decorative trim (optional)
- Screws or nails
- Screwdriver or hammer
Instructions
- Choose a bookcase that fits your desired fireplace dimensions. This will serve as the base for your faux fireplace. If you don’t have a bookcase already, you can often find affordable options at thrift stores or furniture outlets.
- Measure the dimensions of the bookcase and any shelves you plan to remove to create the “fireplace opening.” Use these measurements to cut out a piece of cardboard or foam board that fits the opening perfectly.
- Paint the cardboard or foam board with a color that matches the aesthetic of your room. You can also use contact paper to achieve a different texture or pattern.
- Attach the painted cardboard or foam board to the back of the bookcase using screws or nails. Make sure it is secure and doesn’t move when touched.
- If desired, add decorative trim to the edges of the bookcase to give it a more polished look. This can be simple wooden trim or more ornate molding – choose what fits your style and budget.
- Once your bookcase fireplace is assembled, it’s time to arrange your books to complete the look. Remove any excess shelves and position your books in a way that creates a cozy and inviting atmosphere. You can stack books vertically or horizontally, interspersing accessories like candles or small plants for added visual interest.
- Finally, step back and admire your work! Your DIY bookcase fireplace is now complete and ready to bring warmth and literary charm to your space.
Arranging the books
When arranging your books in the bookcase fireplace, consider these tips to create an aesthetically pleasing and cohesive look:
- Group books by color to create a more organized and visually appealing display.
- Mix in a few decorative bookends or trinkets to add variety and interest.
- Place larger books or coffee table books on the bottom shelves for added stability and visual weight.
- Experiment with different heights and angles to create a dynamic arrangement.
With a bookcase, some creativity, and a love for literature, you can create a stunning and unique faux fireplace that not only adds warmth but also showcases your favorite books. So gather your bookcase and let your imagination run wild as you transform your space into a cozy reading sanctuary.
Mantel and Mirror Fireplace
Looking to add a touch of elegance and sophistication to your living space? A faux fireplace with a mantel and mirror is the perfect choice. Not only does it create a focal point in the room, but it also adds depth and a touch of glamour. Follow these steps to create your own mantel and mirror fireplace.
Materials needed
- Large mirror
- Mantel shelf or salvaged wood
- Nails or screws
- Wall anchors (if needed)
- Level
- Paint or stain
- Paintbrushes
Instructions
- Begin by selecting a large mirror that fits the dimensions of the fireplace opening. This will serve as the backdrop and create the illusion of depth and reflection.
- Attach the mirror to the wall using nails or screws. Make sure to use wall anchors if needed to ensure the mirror is securely fastened. Use a level to ensure the mirror is straight and aligned with the fireplace opening.
- If your faux fireplace does not already have a mantel shelf, you can create your own using salvaged wood or purchase a pre-made mantel shelf. Position the mantel at a height that is aesthetically pleasing and provides enough space for decorative elements.
- Attach the mantel shelf to the wall using nails or screws, making sure it is level and secure. The depth and length of the shelf will depend on your personal preference and the size of your fireplace.
- Once the mirror and mantel shelf are in place, it’s time to add some color and personality. Use paint or stain to finish the mantel and any wood trim or decorative elements. Choose a color that complements your room’s palette and enhances the overall aesthetic.
- Let the paint or stain dry thoroughly before adding any decorative elements to the mantel. This will prevent smudging or damage to your freshly finished fireplace.
- Now comes the fun part – accessorizing your mantel and mirror fireplace! Start by arranging a few key pieces, such as candlesticks, vases, or framed artwork. Play around with different heights, textures, and colors to create an interesting display.
- Remember to keep the overall design balanced and visually pleasing. If you have a larger mantel, consider adding a statement piece or focal point, like a large clock or a piece of artwork.
- Step back and admire your handiwork! Your mantel and mirror fireplace is now complete, ready to bring elegance and charm to your living space.
Adding decorative elements
To truly make your mantel and mirror fireplace shine, consider adding these decorative elements:
- Hang a wreath or garland above the mirror to add a seasonal touch.
- Use candle sconces on either side of the mirror to create symmetry and add warmth.
- Place a large vase or urn filled with flowers or greenery on one end of the mantel for a natural and organic element.
- Add personal touches such as framed family photos, travel souvenirs, or treasured heirlooms to make the space feel unique and reflect your personality.
With a touch of glamour and a dash of DIY know-how, your mantel and mirror fireplace will become the centerpiece of your room. So gather your materials, put on your creative hat, and get ready to enjoy the refined and sophisticated ambiance of your faux fireplace.
This image is property of images.unsplash.com.
Pallet Fireplace
If you’re looking for a budget-friendly and eco-friendly option for your faux fireplace, look no further than a DIY pallet fireplace. Made from discarded pallets, this rustic and charming creation adds warmth and character to any space. Follow these steps to create your own pallet fireplace.
Materials needed
- Wooden pallets
- Crowbar or pry bar
- Hammer
- Sandpaper
- Paint or stain
- Paintbrushes
Instructions
- Begin by sourcing wooden pallets in good condition. You can often find them for free or at a low cost from construction sites, warehouses, or online classifieds. Make sure to choose pallets that are not damaged or splintered.
- Use a crowbar or pry bar to carefully disassemble the pallets. Start by removing the top and bottom boards to create individual pieces of wood. Be cautious and wear protective gloves, as you will be working with nails.
- Once the pallets are disassembled, use a hammer and sandpaper to smooth out any rough edges or splinters. Sand each piece of wood until it is smooth to the touch.
- Decide on the design and size of your pallet fireplace. You can create a simple surround, or include a mantel and base for added authenticity.
- Assemble the pieces of wood to create the desired shape of your fireplace. Use screws or nails to secure the wood together, making sure it is stable and sturdy.
- With your pallet fireplace assembled, it’s time to add some color. Use paint or stain to finish the wood in a shade that matches your room’s décor. You can opt for a natural wood finish, or go with a bold color for a statement piece.
- Let the paint or stain dry completely before moving your fireplace into its final position. This will prevent any smudging or damage to your newly finished creation.
- Once in place, you can decorate your pallet fireplace to enhance the rustic charm. Add candles, lanterns, or a string of fairy lights for a cozy and enchanting atmosphere.
Painting the pallet
To give your pallet fireplace a unique and personalized look, consider these painting techniques:
- Create a distressed or weathered look by applying multiple layers of paint, allowing each layer to dry before adding the next. Once dry, use sandpaper to lightly distress the edges and corners.
- Use stencils or masking tape to create patterns or designs on the wood. Paint over the stencil or remove the tape to reveal the pattern once the paint has dried.
- Apply a whitewash technique to give your pallet fireplace a vintage or beachy feel. Dilute white paint with water, then brush it onto the wood, wiping off any excess with a rag.
With a few wooden pallets and a touch of creativity, you can create a stunning focal point in your room that is both budget-friendly and eco-friendly. So gather your pallets and tools, and get ready to enjoy the warm and rustic charm of your very own DIY pallet fireplace.
Brick Wall Fireplace
If you’ve always admired the timeless and classic look of a brick fireplace, but don’t have the means or space for the real thing, a DIY faux brick wall fireplace is the perfect solution. With a few materials and some creativity, you can create the illusion of a brick wall without breaking the bank. Follow these steps to create your own faux brick wall fireplace.
Materials needed
- Foam insulation sheets
- Box cutter or utility knife
- Ruler or straightedge
- Adhesive or glue
- Joint compound or spackle
- Trowel or putty knife
- Sandpaper
- Paint or stain
- Paintbrushes
Instructions
- Begin by measuring the dimensions of your fireplace opening. This will help determine the amount of foam insulation sheets you will need. You can find foam insulation sheets at most hardware stores.
- Use a box cutter or utility knife to cut the foam insulation sheets into individual brick-sized pieces. A ruler or straightedge can help ensure accurate and straight cuts.
- Once the foam insulation bricks are cut, arrange them on a flat surface to create the desired pattern. You can opt for a traditional brick layout, or get creative with herringbone or basket weave patterns.
- Apply adhesive or glue to the back of each foam brick and press them firmly onto the wall, starting from the bottom and working your way up. Make sure to leave a small gap between each brick to mimic the mortar lines.
- Continue applying bricks until the entire fireplace opening is covered. If needed, use a box cutter or utility knife to trim any bricks that need to fit into corners or around irregular edges.
- Once the foam bricks are securely attached, it’s time to create the texture and appearance of real brick. Apply a thin layer of joint compound or spackle over the foam bricks using a trowel or putty knife. Use a light touch and feather the edges for a more natural look.
- Let the joint compound or spackle dry completely before moving on to the next step. This may take several hours or overnight, depending on the product and the environment.
- Once dry, sand the joint compound or spackle gently with sandpaper to smooth out any rough edges or imperfections. Wipe away any dust with a clean cloth.
- Now it’s time to add some color to your faux brick wall. Use paint or stain in a shade that matches your room’s aesthetic. Apply the paint or stain with a paintbrush, allowing it to seep into the crevices for a realistic look. You can use a rag to wipe away excess paint for a more weathered appearance.
Creating a brick effect
To enhance the illusion of a real brick wall, consider these additional techniques:
- Use multiple shades of paint or stain to create depth and variation in the color of your faux bricks.
- Apply a light wash of white or off-white paint over the bricks, then wipe away the excess with a rag. This will give them a worn and weathered look.
- Add small touches of moss or greenery between the faux bricks to mimic the aging process of real brick walls.
With some foam insulation sheets, joint compound, and a little bit of paint, you can create a stunning faux brick wall fireplace that will add warmth and timeless charm to your space. So roll up your sleeves, get creative, and enjoy the classic beauty of your DIY faux brick wall fireplace.
This image is property of images.unsplash.com.
TV Stand Fireplace
Imagine cuddling up on the couch with a cup of hot cocoa, watching your favorite movie while enjoying the cozy warmth of a fireplace. With a TV stand fireplace, you can have the best of both worlds! This DIY faux fireplace not only adds ambiance to your living space but also provides a functional space for your television. Follow these steps to create your own TV stand fireplace.
Materials needed
- TV stand or media console
- Electric fireplace insert
- Screwdriver or drill
- Wood screws
- Level
- Paint or stain
- Paintbrushes
Instructions
- Begin by selecting a TV stand or media console that fits the size of your television and complements your room’s décor. Consider the height, width, and storage options of the stand, as well as any additional features like shelves or cable management.
- Once you have your TV stand, it’s time to install the electric fireplace insert. These can be purchased at most home improvement stores or online. Follow the manufacturer’s instructions to install the fireplace insert securely in the designated space of the stand. Use a screwdriver or drill and wood screws to attach any necessary brackets or supports.
- Before placing your television on the stand, make sure it is stable and level. Use a level to ensure the stand is straight and adjust as necessary.
- With your TV stand fireplace fully assembled, it’s time to add some color. Use paint or stain to finish the wood in a shade that matches your room’s décor. You can choose a color that complements the fireplace insert or go with a contrasting color for added visual interest.
- Let the paint or stain dry completely before moving your TV stand fireplace into its final position. This will prevent any smudging or damage to your newly finished creation.
- Once in place, arrange your television and any additional electronics or accessories on the TV stand. Make sure to leave enough space around the fireplace insert for ventilation.
- Step back and enjoy the cozy and functional ambiance of your TV stand fireplace. Gather some blankets and pillows, turn on the electric fireplace, and settle in for a movie night like no other.
Incorporating an Electric fireplace insert
To make the most of your TV stand fireplace, consider these additional tips:
- Use the storage shelves or cabinets of the TV stand to house DVDs, video game consoles, or extra blankets for easy access.
- Decorate the mantel or shelves with framed photos, candles, or decorative accessories to personalize the space.
- Add a sound bar or surround sound speakers to enhance the viewing experience and create a more immersive atmosphere.
With a TV stand and an electric fireplace insert, you can create a cozy and functional entertainment center that will be the envy of your friends and family. So grab your tools, set up your favorite movies, and get ready to enjoy the ultimate movie night experience with your very own DIY TV stand fireplace.
Corner Faux Fireplace
If you have a small or awkwardly shaped room, a corner faux fireplace might be the perfect solution to maximize space and bring warmth to your home. This DIY project is not only functional but also adds charm and coziness to any corner. Follow these steps to create your own corner faux fireplace.
Materials needed
- Shelf or wooden boards
- Screws or nails
- Screwdriver or hammer
- Level
- Paint or stain
- Paintbrushes
Instructions
- Start by selecting a shelf or wooden boards that fit the dimensions of your desired fireplace shape. The size and shape will depend on the available space and your personal preference.
- Measure the height and width of the corner where you plan to install your faux fireplace. Use these measurements to cut the shelf or wooden boards to the appropriate size.
- If using wooden boards, attach them securely to the wall using screws or nails. Make sure to use a level to ensure the boards are straight and even. If using a pre-made shelf, simply install it in the corner using the manufacturer’s instructions.
- Once the shelf or boards are in place, it’s time to add some color. Use paint or stain to finish the wood in a shade that matches your room’s décor. You can go for a natural wood finish, or choose a bold color to make a statement.
- Let the paint or stain dry completely before moving on to the next step. This will prevent any smudging or damage to your newly finished faux fireplace.
- Once dry, it’s time to decorate your corner faux fireplace. Place candles, lanterns, or small plants on the shelf or hang artwork above it to create a focal point. You can also add a festive touch by hanging a garland or string lights around the fireplace.
Accessorizing the corner space
To make the most of your corner faux fireplace, consider these additional tips:
- Install shelves or small cabinets on adjacent walls to create additional storage space and enhance the functionality of the corner.
- Place a comfortable chair or bean bag nearby for a cozy reading nook or relaxation spot.
- Hang a mirror adjacent to the fireplace to create the illusion of more space and reflect the cozy ambiance.
With a corner faux fireplace, you can turn any unused corner into a cozy and inviting retreat. So gather your materials, choose your favorite corner, and create a warm and charming focal point that maximizes both space and style.
Mirror Reflection Fireplace
If you’re looking to add a touch of glamour and elegance to your space, a mirror reflection fireplace is the perfect choice. With a well-placed mirror, you can create the illusion of a larger room and capture the beauty of a flickering fire. Follow these steps to create your own mirror reflection fireplace.
Materials needed
- Large mirror
- Adhesive or mirror clips
- Level
- Screws or nails (if using mirror clips)
- Paint or stain (optional)
- Paintbrushes (optional)
Instructions
- Begin by selecting a large mirror that fits the dimensions of your fireplace opening. It’s important to choose a mirror that is rated for use in a fireplace to ensure safety.
- Decide on the placement of the mirror in relation to the fireplace opening. You can choose to position it directly above the opening or at an angle to reflect the fire from the side.
- If using adhesive, follow the manufacturer’s instructions to attach the mirror securely to the wall. Make sure to use a level to ensure it is straight and aligned with the fireplace opening. If using mirror clips, attach them to the back of the mirror with screws or nails, then secure the mirror to the wall using the clips.
- Once the mirror is securely in place, step back and admire its reflection. If desired, you can paint or stain the frame of the mirror to match the aesthetic of your room. Use paint or stain in a color that complements your existing décor and follow the manufacturer’s instructions for application.
- Let the paint or stain dry completely before adding any additional decorative elements or moving the mirror in any way.
Choosing the right mirror
When selecting a mirror for your mirror reflection fireplace, consider the following tips:
- Choose a mirror with a frame that matches the style and color scheme of your room. A traditional wooden frame works well for a classic look, while a sleek metal frame adds a contemporary touch.
- Opt for a mirror with beveled edges to create an added visual interest and enhance the reflection.
- Consider the size and shape of the mirror in relation to the fireplace opening. A large rectangular mirror is a popular choice, but you can also experiment with different shapes like oval or round to create a unique statement.
With a well-placed mirror, your fireplace will not only provide warmth but also become a stunning focal point in your room. So find the perfect mirror, hang it with care, and enjoy the glamorous ambiance and illusion of a larger space created by your mirror reflection fireplace.
Chalkboard Fireplace
If you love to get creative and enjoy changing your home décor with the seasons, a chalkboard fireplace is the perfect choice. This DIY faux fireplace allows you to customize your space and write holiday messages or draw festive designs. Follow these steps to create your own chalkboard fireplace.
Materials needed
- Chalkboard paint
- Paintbrushes
- Sandpaper
- Plywood or MDF board
- Box cutter or circular saw
- Nails or screws
- Screwdriver or drill
- Level
Instructions
- Start by selecting a plywood or MDF board that fits the dimensions of your desired fireplace shape. This will serve as the surface for the chalkboard paint.
- Use a box cutter or circular saw to cut the board to the appropriate size and shape. A rectangular shape is the most common choice, but you can get creative and experiment with different shapes like arched or scalloped.
- Once the board is cut, sand the edges and smooth any rough areas with sandpaper.
- Apply chalkboard paint to the board following the manufacturer’s instructions. Make sure to paint in a well-ventilated area and use multiple coats for a smooth and even finish. Allow the paint to dry completely between coats.
- Once the chalkboard paint is dry, attach the board securely to the wall using nails or screws. Make sure to use a level to ensure it is straight and aligned with the fireplace opening.
- Step back and admire your newly created chalkboard fireplace. Grab a box of chalk and start writing holiday messages, drawing seasonal designs, or even creating a countdown to your favorite holiday.
Writing holiday messages
To make the most of your chalkboard fireplace, consider these tips:
- Use different colors of chalk to create vibrant and eye-catching designs.
- Add seasonal motifs like snowflakes for winter, flowers for spring, or pumpkins for fall.
- Include inspirational quotes or fun messages to set the mood for the season.
With a chalkboard fireplace, your holiday décor possibilities are endless. So grab your chalk and let your creativity run wild as you bring joy and festivity to your space with your very own DIY chalkboard fireplace.

